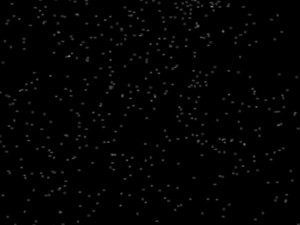
模拟下雪效果是比较困难的任务,我们注意到,雪花的移动方式有些接近在空气中的波动模式,不是一直都下坠的。如果以独立的随机运动来制作下雪的效果是远远不够的,因为附近的雪花都是以相同的方式运动。本小节的示例代码试图使用鼠标的运动来模拟风,从而对雪花的运动产生影响。
示例文件snowFlake.as文件,设置了单片雪花的粒子属性,并自定义了随风运动的方法blow。Snow.as文件是将单片雪花加载进来,并设置它的环境边界。让我们首先来看一下snowFlake.as的代码:
package{
	import com.particles.Particle;

	import flash.events.Event;
	import flash.filters.BlurFilter;

	[SWF(width="800", height="600", backgroundColor="0x000000", frameRate="31")]
	public class snowFlake extends Particle{
		private var random:Number=(Math.random()*6+9)/10;
		public var target:Number=0;
		public var acceleration:Number=0;
		public var velocity:Number=0;
		public var wind:Number=0;

		public function snowFlake(){
			var particle:Ball=new Ball(3, 0xffffff, 1, 0xffffff, 0);
			addChild(particle);
			particle.x=0;
			particle.y=0;
			xVelocity=Math.random() * 4 - 2;
			yVelocity=Math.random() + 1.5;
			growX=(Math.random() * 90 + 70) / 100;
			growY=(Math.random() * 40 + 40) / 100;
			fade=Math.random() * 20 + 80;
			filters=[new BlurFilter(Math.random() * 5 + 5, Math.random() * 4 + 3, 1)];
		}

		public function blow():void{
			target=Math.min(150, Math.max(-150, (stage.mouseX - 300) / 2));
			acceleration += (target-velocity)*0.01;
			acceleration *= 0.94;
			velocity += acceleration;
			wind = velocity/20;

			x += xVelocity*random+wind*random*0.3;
			y += yVelocity*random;
		}
	}
}
在代码中将雪花的xVelocity设置为-2~2之间的随机数,因为雪花总体运动方向是下落的,所以将yVelocity设置为1.5~2.5之间的随机值。为了使雪花各自具有不同的大小,将growX设置为0.7~1.6的随机数,growY设置为0.4~0.8之间的随机数。并且为雪花加上了Blurfilter。
blow函数实现了雪花随鼠标运动而飘动的运动效果。主要利用了Keith Peters在《Foundation Ationsript 3.0 Animation:Make things move!》一书中讲到的弹动公式:
vx += (targetX - sprite.x) * spring;
vy += (targetY - sprite.y) * spring;
vx *= friction;
vy *= friction;
sprite.x += vx;
sprite.y += vy;
代码将弹动的目标target设置为-150~150之间的随机数,将弹动系数设置为0.01,应用了弹动公式。雪花的运动幅度是比较小的,所以将它除以20以缩小它的运动幅度。最后是将得到的风速度、设置好的xVelocity、yVelocity,以及一些随机值累加起来使雪花产生实际的运动。
Snow.as文件主要完成加载snowFlake.as,并设置它运动的环境边界。源代码如下:
package{
	import flash.display.Sprite;
	import flash.events.Event;

	[SWF(width="800", height="600", backgroundColor="0x000000", frameRate="31")]
	public class Snow extends Sprite{
		private var counts:uint=0;
		private var flakes:Array;

		public function Snow(){
			flakes=new Array();
			addEventListener(Event.ENTER_FRAME, onEnterFrame);
		}

		private function onEnterFrame(e:Event):void{
			for (var i:int=0; i < flakes.length; i++){
				var flake:snowFlake=flakes[i];
				var xpos:Number=flake.x;
				var ypos:Number=flake.y;

				flake.blow();

				if (ypos > stage.stageHeight){
					flake.x=Math.random() * 600 + 20;
					flake.y=-Math.random() * 50;
				}
				if (xpos < 0){
					flake.x+=stage.stageWidth;
				}
				else if (xpos > stage.stageWidth){
					flake.x-=stage.stageWidth;
				}
			}

			if (counts > 800){
				return;
			}
			var j:uint=Math.round(Math.random() * 4);
			while (j--){
				++counts;
				var snow:snowFlake=new snowFlake();
				snow.x=Math.random() * 600 + 20;
				snow.y=-Math.random() * 50;
				addChild(snow);
				flakes.push(snow);
			}
		}
	}
}
既然已经明确了Snow.as文件要完成的功能,那么在onEnterFrame函数中就非常明确地完成了这两部分功能。首先是运动和检测环境边界,在for循环中完成遍历flakes数组中的所有雪花,调用blow方法使其运动。由于雪花不会向上运动,所以不必检测Y轴的上部的环境边界。其次完成雪花的加载,在for循环后的代码实现了加载功能。为了提高加载的效率,每次只加载不超过4个的雪花。为了完成该功能,定义一个0~4之间的随机数j,通过while(j–)使随机数累减直到0时退出while循环。在while循环体中,累加count变量,加载雪花,定义它的随机位置,添加到显示对象列表中,最后压入到flakes数组。如果count变量大于800,执行return,则不会执行下面的加载语句。


